

You’ve read the headlines: fermented foods are the key to a happy gut. And it’s true. But if you’re a beginner, the prospect can feel like a chemistry experiment waiting to fail. I remember my first batch of sauerkraut—I was so scared of “bad bacteria” that I checked the jar every two hours for a week. The result? A limp, slightly sad cabbage that tasted more like salt than anything else.
It took me years of trial and error—and a few genuinely moldy disasters—to figure out that fermentation isn’t about being precise. It’s about understanding a few basic principles. Once you get those, you don’t need a library of complex recipes. You need a handful of reliable, forgiving ones that you can adapt to whatever’s in your fridge.
This isn’t about fancy equipment or obscure ingredients. It’s about building a simple, sustainable practice that genuinely benefits your health. Let’s strip away the mystique and get you fermenting something delicious this week.
Key Takeaways
- Start with salt-based vegetable ferments—they are the most forgiving and require the least equipment.
- The 2% salt rule is your safety net. It’s the single most important concept for a beginner.
- Your senses—especially smell and sight—are your best tools. Trust them over any recipe's timeline.
- “Small batch” is your superpower. It minimizes waste and makes experimentation less intimidating.
- Fermentation is a skill of observation, not a precise science. The goal is confidence, not perfection.
Why Lacto-Fermentation Is The Perfect Starting Point
When we talk about fermentation for gut health, we’re almost always talking about lacto-fermentation. It sounds scientific, but it’s simply the process of using salt to encourage the good bacteria (Lactobacillus) already living on your vegetables to thrive. They eat the sugars and produce lactic acid, which preserves the food and gives it that tangy flavor. It’s the technique behind sauerkraut, pickles, and kimchi. The beauty of this method is its simplicity: you don’t need a starter culture, and the salt does the heavy lifting of keeping the bad stuff at bay while the good guys get to work.
I’ve tried all the fermentation styles—from koji to sourdough to kefir—and lacto-fermentation is simply the most logical place to begin. It’s fast, it’s cheap, and it’s almost impossible to get wrong if you follow a few simple rules. The other methods have their charms, but they require more specialized equipment or ingredients. This one just needs vegetables, salt, water, and a jar.
The Golden Rule: The 2% Salt Rule
Forget the complex brine recipes that have you weighing water and salt separately. There’s a much simpler, more reliable method for beginners: weigh your vegetables, then add 2% of that weight in salt. That’s it. If you have 500 grams of shredded cabbage, you add 10 grams of salt. This isn’t an arbitrary number. It’s the magic threshold that creates an environment where Lactobacillus flourishes while inhibiting the bacteria and molds that cause spoilage.
I use this rule for almost everything—beets, carrots, green beans. I honestly have a small digital kitchen scale that I use exclusively for this. It’s a game-changer. The 2% rule eliminates the guesswork. It gives you a consistent baseline that you can adjust later once you understand your own taste preferences and the climate you live in. When I first started, I was using a handful of salt “to taste,” which is a recipe for disaster. The scale is the first step to predictable results.
Your First Recipe: A Foolproof Sauerkraut
This is the recipe that finally worked for me after my early failures. It’s the perfect vehicle for learning the core principals because cabbage is sturdy, cheap, and readily available all year round.
- Ingredients: 1 medium head of green or red cabbage (about 1 kg / 2.2 lbs), 20g (about 1 tbsp) of fine sea salt or kosher salt (no iodine).
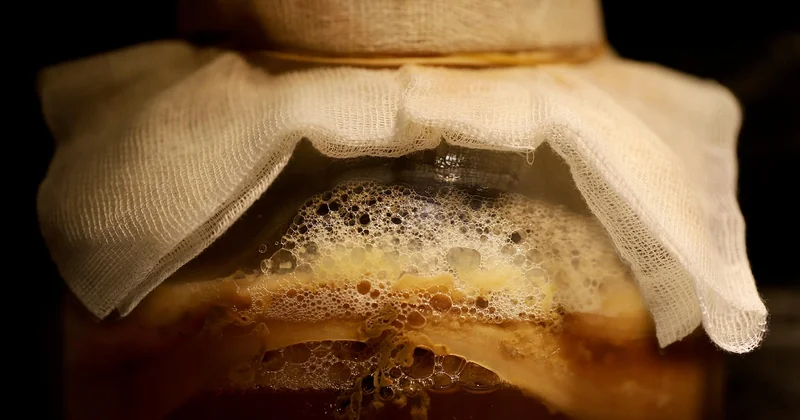
- Method: Shred the cabbage finely. In a large bowl, massage the salt into the cabbage for about 5 minutes. You’ll notice it starts releasing liquid—this is your brine. Pack the cabbage tightly into a clean glass jar, pushing it down until the liquid rises to cover the top of the cabbage. Use a small glass weight or a smaller jar filled with water to keep the cabbage submerged. Cover the top with a cloth and a rubber band to keep dust out while allowing airflow.
- Fermentation Time: Leave it at room temperature (ideally 18-22°C / 65-72°F) for at least 5-7 days. Taste it daily after day 4. When it’s tangy and pleasing to you, cap it tightly and put it in the fridge. The cold slows the fermentation dramatically, preserving your work.
The most common issue is not enough brine. If the cabbage isn’t submerged, it will mold. This is why packing it down well is critical. Using a clean weight ensures it stays that way. The other mistake I made early on was using tap water in the brine or on my equipment. Chlorine can kill the good bacteria. Always use filtered or unchlorinated water for everything that touches your ferment.
Troubleshooting: What To Do When Things Go Wrong
Every fermentation blogger has a hidden catalog of failures, and I’m no exception. I’ve had jars that smelled like a wet sock, and others that developed a fuzzy blue mold cap. It’s part of the learning curve. The key is to learn what’s a deal-breaker and what’s just a cosmetic issue. Let’s break down the most common problems you will probably encounter.
Issue 1: The White Film (Kahm Yeast)
You might see a thin, white, chalky film on the surface of your brine. This is not mold. It’s a harmless yeast called Kahm. It can taste slightly bitter, but it’s perfectly safe. The catch? It’s a sign that your ferment was exposed to too much oxygen. You can just skim it off and proceed. I’ve eaten ferments that had Kahm yeast and lived to tell the tale. It’s a great lesson in sensory evaluation: it looks scary, but it isn’t a health risk.
Issue 2: The Fuzzy Growth (Actual Mold)
True mold is fuzzy, often green, black, or pink, and it usually sits on top of the liquid, not submerged. The rule is simple: if it’s fuzzy, throw the whole batch away. There is no saving it. This is almost always caused by vegetables not being fully submerged or by equipment that wasn’t clean enough. This is the one time where you should be absolutely ruthless. The risk of mycotoxins isn't worth it.
Issue 3: Soft or Mushy Vegetables
A good ferment has a satisfying crunch. When it turns mushy, it’s often because the temperature was too high, or the ferment went on too long. I’ve had a summer batch of pickles turn to mush in a heatwave. For firmer results, you can add a source of tannins like a grape leaf or a black tea bag to the jar. This helps keep the cell walls of the vegetable crisp. Also, try to find a cooler spot in your house—a basement or a less sun-drenched cupboard is ideal.
How to Build a Sustainable Fermentation Routine
The most frequent question I get isn’t about a specific recipe; it’s about how to make this a habit. People start with a bang, ferment ten jars, and then get overwhelmed. The solution, I’ve found, is a progressive plan. Starting with one simple ferment and building from there is far more effective than trying to do everything at once. I recommend a one-month plan: Master one ferment before moving to the next.

- Week 1-2: Focus on the sauerkraut recipe above. Make it twice. Obsess over the 2% rule. Get comfortable with the daily ritual of checking the jar and the smell of the ferment changing.
- Week 3: Try a different vegetable using the same technique. Small-batch fermented carrots are a great second step. Just slice them into sticks, weigh them, mix with 2% salt and a little water to cover, and ferment them for 5 days. The process is identical, but the texture and flavor profile are completely different, which is a great learning experience.
- Week 4: Get bold. Try adding spices or flavorings to your base recipe. Caraway seeds in sauerkraut, garlic and dill in the carrots. This is where you start making the ferments your own.
By the end of the month, you won’t just have a fridge full of healthy food. You’ll have the foundational skill and the confidence to look at any vegetable and know exactly how to transform it.
Small Batch Variations: Salsa, Carrots, and More
The sauerkraut formula is a gateway, not a destination. Once you’ve mastered it, you can apply the exact same principle to a universe of other ingredients. The key is to keep your batches small. I rarely make more than a quart at a time. This way, I’m always trying new things and I never have a jar moldering in the back of the fridge that I’m afraid to open.
The Magic of Fermented Carrot Sticks
This is my weekday go-to. It’s a crunchy, salty, snack that’s replaced potato chips for me. The method: Take 500g of carrots, cut them into sticks, and weigh them. Mix with 10g of salt. Toss them in a bowl with a teaspoon of caraway seeds (my favorite) and pack them into a jar. Press down firmly—the salt will draw out enough liquid to cover them within a few hours. If not, add a little filtered water to ensure they’re submerged. They’re ready in as little as 5 days on the counter, but they get better after a week in the fridge.
I always have a jar of these in my fridge. It’s my daily dose of probiotics and it’s as easy as making a salad. The carrots maintain a wonderful crunch that gets even better with time. It’s a testament to the fact that the simplest recipes are often the ones you actually stick with.
A Fiery Fermented Salsa
This goes fast in my house. It’s a completely different taste profile, but the method is the same. The ingredients: About 500g of ripe tomatoes (Roma works best), half an onion, two cloves of garlic, and one or two jalapeños (depending on your spice tolerance). Chop it all roughly, mix with 10g of salt, and pack it into a jar. This one produces a ton of liquid. I like to ferment it for just 3 days—it’s fresher and brighter. After that, into the fridge, where it will keep for months.
The flavor is profound. It has a depth and a fizziness that you simply cannot achieve with raw tomatoes. The tangy, savory notes make it an incredible topping for eggs, tacos, or just with a spoon. It’s a crowd-pleaser that also happens to be incredibly good for you.
Answering the Questions You Actually Have
People often have very specific questions about how to fit fermentation into their lives. Let’s address the ones I hear most often from my readers.
Which fermented foods are best for overall gut health?
There’s no single “best” food. A diversity of fermenting microbes is the goal. In my experience, diversity in your diet is more important than the specific probiotic strains. That’s why I recommend rotating between vegetable ferments (sauerkraut, kimchi, pickles) and dairy ferments (yogurt, kefir) if you can tolerate them. Those are the two main categories that provide a broad spectrum of beneficial bacteria. My personal routine is a serving of a vegetable ferment with lunch, and a small glass of kefir in the evening. It’s a habit that has worked for me for years.
How much fermented food should you eat every day?
This is a question I get asked constantly. You don’t need to eat a bowl of sauerkraut. Aim for a few forkfuls or a small glass—about 1-2 tablespoons—as a condiment with a meal is more than enough to start. Your gut needs time to adjust. If you go overboard on your first day, you’ll probably experience some bloating and gas. Start small, listen to your body, and gradually increase the amount as you feel comfortable. In my experience, consistency beats volume.
What is the essential equipment for starting out?
Less than you think. You absolutely do not need a special fermentation crock or specialty airlock lids to be successful. I use simple, wide-mouth, quart-sized mason jars that I already owned. You'll also need a way to keep the vegetables submerged. I initially used a small, clean ziplock bag filled with water, but the dedicated glass weights are a worthwhile investment. Beyond that, you need a digital kitchen scale accurate to 1 gram and some cheesecloth or a clean dish towel to cover the top. That’s the entire kit. I genuinely believe that buying expensive kits before you know you love the hobby is a waste of money.
The Habit That Sticks
The real secret to easy, beginner-friendly fermentation isn’t a perfect recipe—it’s the willingness to make a few imperfect batches. The first time you successfully create a jar of something that is not only edible but delicious—something that fizzes and pops and tastes more vibrant than the cabbage you started with—you’ll be hooked. That feeling of control and creation is what turns a single ferment into a lifelong habit. Your gut, and your taste buds, will thank you for it.


